How to configure Okta
For the full integration we have to do some work on the Okta side as well. First of all, we have to integrate Workspace ONE as an application which will be used for SCIM provisioning but as well for SAML authentication into the Workspace ONE UEM Self-Service-Portal (SSP) where the user can later on see their devices for instance.
Configure the Workspace ONE application in Okta
To be able to provision users from the Okta Universal Directory to Workspace ONE Access into the recently created domain (OKTA.COM), we have to integrate the Workspace ONE application into Okta. That works via SCIM provisioning (SCIM adapter).
- Login to the Okta tenant
- If you use an Okta developer Account, check if you in the Classic UI. Otherwise Click in the upper left corner in Developer Console and switch to the Classic UI.
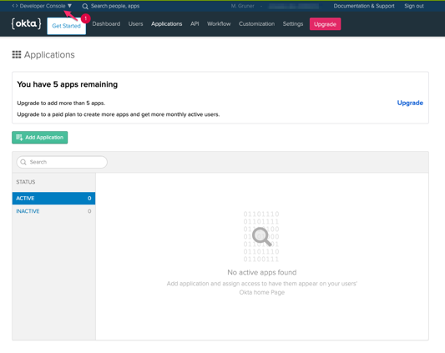
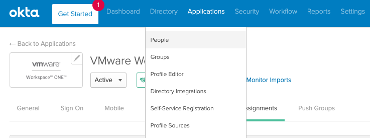
- You should see a console as below
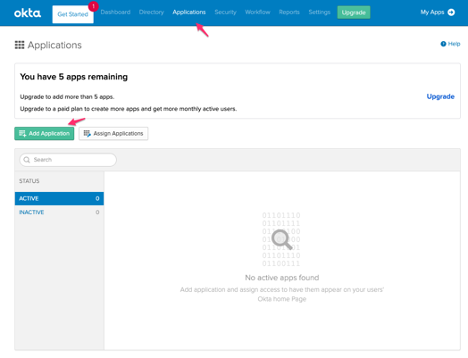
- Tab Applications
- Applications
- Add Application
- In the search box type in Workspace ONE
- Choose the right application
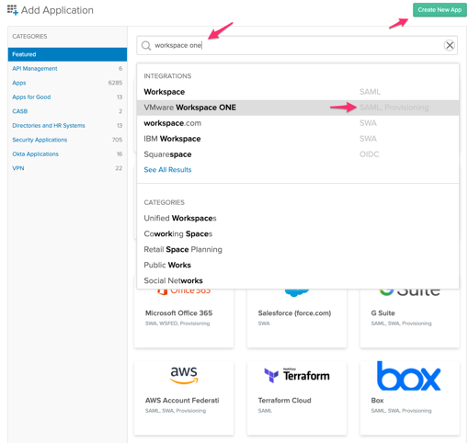
Click Add
Now we will configure the Workspace ONE application. The Application label is a free text field where you can choose whatever you want. The Base URL is your Workspace ONE Access tenant.
Application label: VMware Workspace ONE (example)
Base URL: myWorkspaceONEAccess tenant (example: https://mytenant.vmwareidentity.com)
(caution: Make sure you don´t have a “/” at the end of the URL, otherwise you will get an error as shown below!)

Application Visibility: you can configure it how you need it in your case
Click Done
As the next step we will enable the provisioning to automate the VMware Workspace ONE user account creation, deactivation and update.
Click in the Workspace ONE application the provisioning tab (if you don´t have it, provisioning is not enabled from a license perspective from Okta. Then contact Okta).
Caution: Okta disable it sometimes in trials because it is hosted on AWS Webservices and each user provision will generate costs.

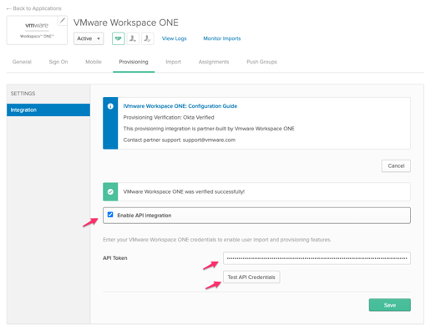
- Click Configure API Integration
- Now in the shown window
- Check the box Enable API Integration
- API Token: paste in your created Bearer Token which you have created with Postman
- Click Test API Credentials for a quick check
- Save
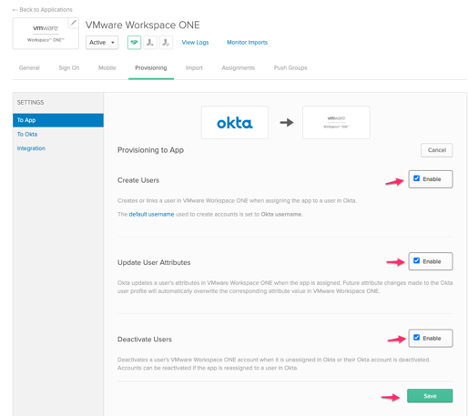
Now we enable the creation of users, update of attributes and deactivation of users.
- Click Edit
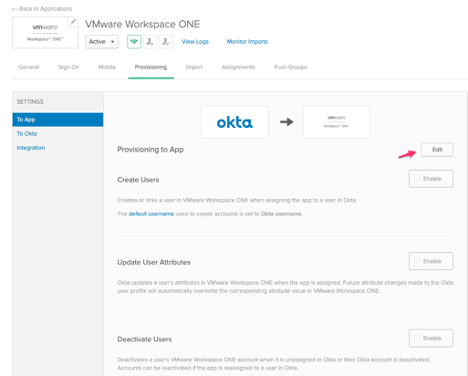
- Check the enable boxes:
- Create Users
- Update User Attributes
- Deactivate Users
- Save
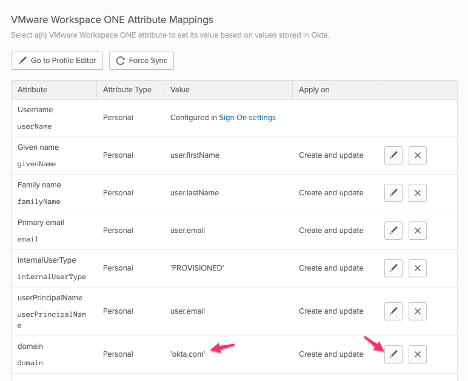
- Scroll down to the Workspace ONE Attribute Mappings
- Click Edit at domain entry and put in the domain you have created with Postman for Workspace ONE Access (OKTA.com here)
- Tab General
- Application visibility
- Check the box Do not display application icon to users
- Check the box Do not display application icon in the Okta Mobile app
The configuration of the user provisioning via SCIM is now complete.
Create Okta Users to synchronize to Workspace ONE Access
If you want to create and provisioning users to Workspace ONE Access now, go to
- Assignments
- Assign
- Choose People or Group
- If you start from scratch:
- Click in Directory
- Click on People
- Add Person
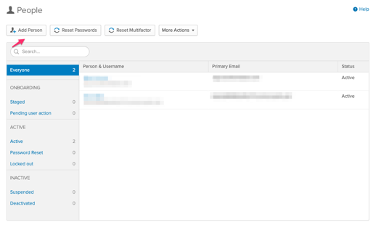
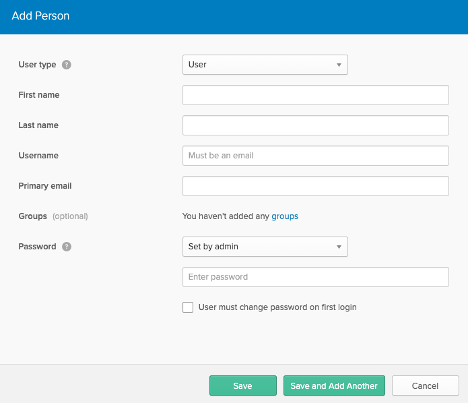
- Type in the necessary information
- Password: In a PoC choose set by admin (default is set by user) and
- Uncheck the box User must change password on first login
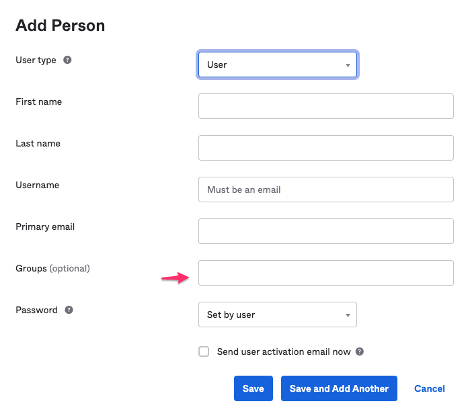
Note: With the new feature update in Okta (2021-02-10) you can assign the user during creation to a group. That makes the workflow much easier and faster because through the group assignment the user will get directly all applications which are assigned to a group.
Additionally, that’s the reason because the following screenshots will have another look and feel.
Application assignment
After the user is created click on the username and click Assign Applications. Choose the Workspace ONE application and assign it to the user.
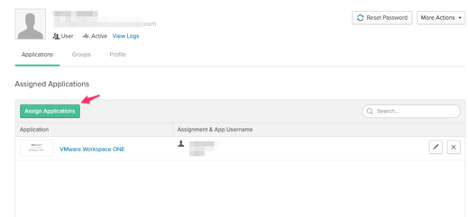
Alternatively, you can push groups by choosing the Push Groups tab and choose a group. Memberships will be pushed as well. (See Create Okta Group to synchronize to Workspace ONE Access)

User provisioning
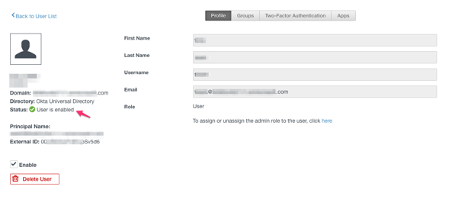
After the application is assigned, the user will be created in Workspace ONE Access in the created Directory. If you remove or disable the application for the user, the user will be disabled in Workspace ONE Access (and all other systems which are federated like Azure).
If you configure the user provisioning from Workspace ONE Access to Workspace ONE UEM as well, they will be provisioned or disabled there as well. Great user provision workflow, right?
As you can see below the user was provisioned and automatically enabled.

Just in Time provisioning (JIT)
If you are using Just-in-Time (JIT) provisioning to create the users in Workspace ONE Access, you have to use a web browser first to log into Workspace ONE initially before using the Workspace ONE Hub app for your device. The reason behind that is that the user has to exist in Workspace ONE UEM at the time of the enrollment.
To do that, you have to send a valid GUID to Workspace ONE as part of the SAML attributes. This is a requirement if you want to use the Workspace ONE Hub application to enroll your device to Workspace ONE UEM. This GUID will be mapped to the External ID which comes from Workspace ONE Access and provisioned to Workspace ONE UEM.