Integration of Microsoft Azure AD and Office 365 in Okta
As next we integrate Microsoft Azure AD into Okta that we can provision users from Okta to Azure AD as well. In that case we can use two scenarios of integration, Password sync or a Domain based Federation between Okta and Azure AD. As result of Domain federation, we then will have the same user account across the whole solution and all systems without the need to sync passwords over. That’s a kind of a security aspect.
That’s pretty cool because then you can use in case of Windows 10 device enrolment the OOBE enrollment into Workspace ONE (UEM) for instance. The user will authenticate against Okta (if you want with MFA as well) first and enroll the device in the same workflow directly into Azure AD. A really impressive Out-of-the-box (OOBE) experience for the users because you can order a Windows 10 Laptop and ship it directly to your users and they can be productive in around 15 min. Policies are set, applications deployed etc.
Scenario 1 – Password sync or random password generation
Now we integrate Azure AD and O365 into Okta.
- Log into your Okta tenant
- Applications
- Applications
- Add Application
- Choose Microsoft O365
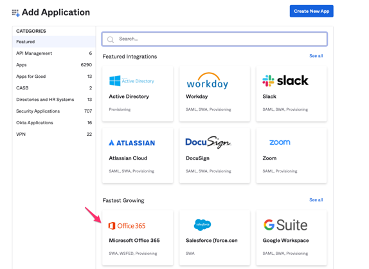
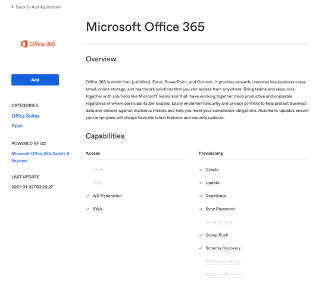
- Add
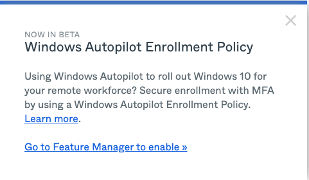
- A popup window will be shown for the Windows Autopilot Enrollment Policy (Beta)
- Here was an update and the new feature will be available in Beta
- Application Name: Choose a name for the application which will be shown in the User Portal afterwards for the Users (example: Microsoft Office 365)
- Microsoft Tenant Name: That is the domain of Azure AD which
you want to federate. You can choose the main domain or create a new one
(example: federation.mydomain.com).
- That is a publicly available domain
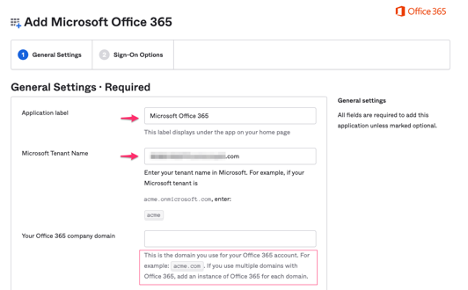
- Your Office 365 company domain
- That’s the domain you use for your Office 365 account (can´t be empty)
- If you use multiple domains with Office 365, add an instance of Office 365 for each domain
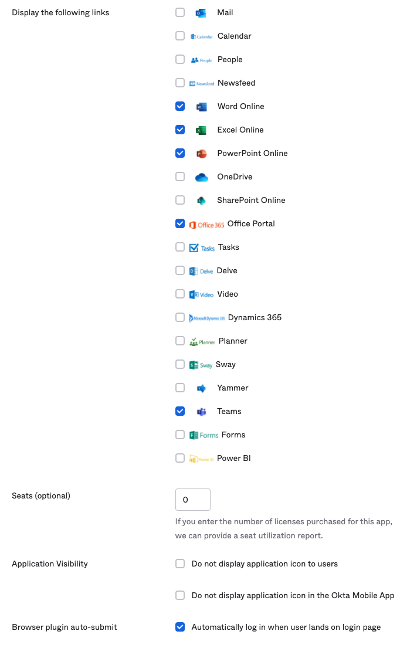
- Choose the applications from Office 365 which you want to integrate and be shown in the User Portal (that applications will be assigned to the users)
- Seats, here you can enter the purchased licenses which give you the possibility to get a seat utilization report in Okta (optional)
- Leave the other boxes default
- Next
- Choose your Single-Sign-on (SSO) options
- Here Administrator sets username, password is the same as users Okta password
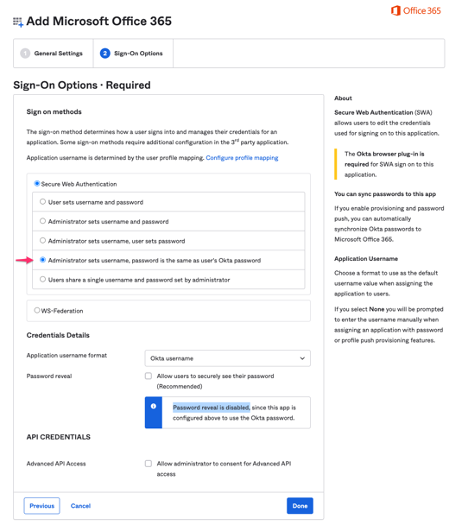
Note: You can enable the box Password reveal to Allow users to securely see their password. Then during the creation of the user, you set the option User must change password on first login. The user log into the okta tenant and will change the password. At the next login he sees an information popup that the password was changed and can enable to see his randomly created password for Microsoft Office 365.
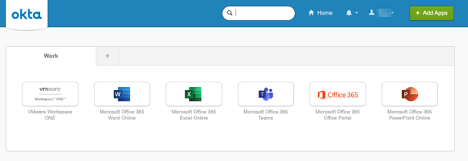
Now the Microsoft Office 365 applications will be deployed into the Okta user portal. You can configure that these applications will be make available in the Workspace ONE Access user portal as well (I will describe it later).
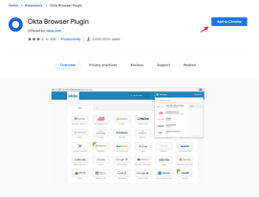
To use the applications in the Okta user portal you have to install the Okta Browser Plugin in case you use it in the Web portal.
- Install Plugin
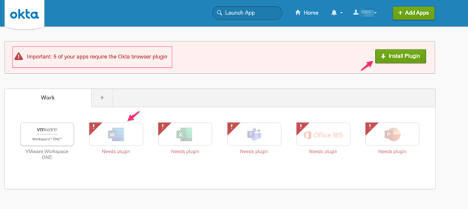
- You will be redirected to the Browser Plugin Store
- In my case the Chrome Extensions
- Add to Chrome
- (caution: That don´t work in an incognito / privateBrowser window)
Now the Microsoft Office 365 applications are enabled and useable for the user in the Okta user portal.
We enable group push in the Microsoft Office 365 application to push them to Microsoft Office 365. If enabled, Okta sends user membership changes to the corresponding group in Microsoft Office 365.
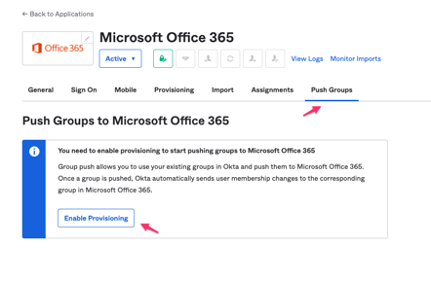
- Enable Provisioning
- Enable API Integration
- Enter Admin Username
- Enter Admin Password
- Choose to Import Groups
- Test API Credentials
- Save
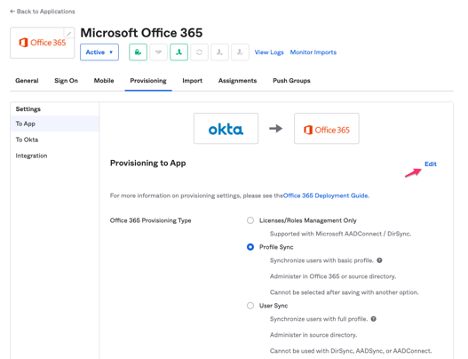
- Tab Provisioning (Pay attention to the different options)
- Edit
- Profile Sync (Default – You can´t make changes to the UPN in Azure and two other attributes)
- User Sync (If you want to do that, use User Sync which gives you the full profile capabilities)
- Set the features you need for the following options
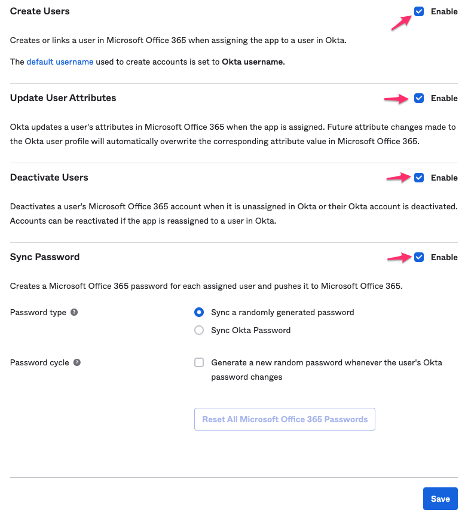
- Create Users
- Update User Attributes
- Deactivate Users
- Sync Password
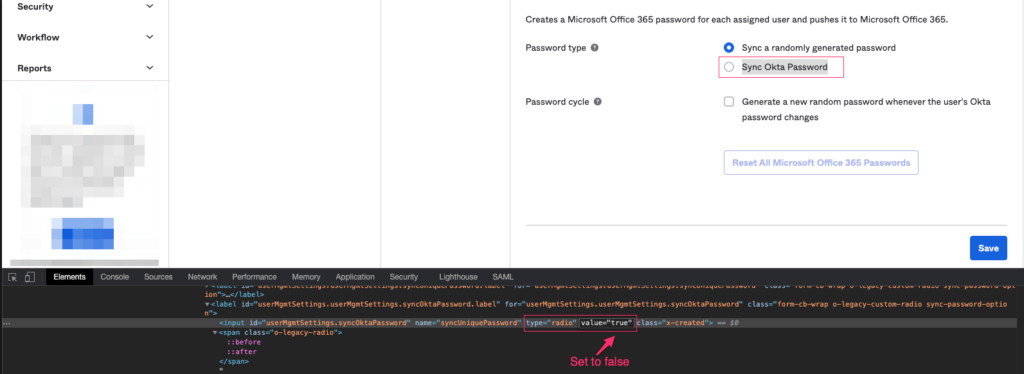
- If enabled, you can set sync the Okta password, or
- Sync a randomly generated password incl. password cycle
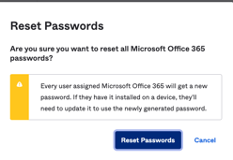
- In that case you can additionally reset all Microsoft Office 365 password and a new one will be generated
Note:At the moment (2021-02-17) there is a bug in the Okta GUI that you can´t tick the box Sync Okta Password but that is only the HTML code from the frontend. You can enable / change it by edit the HTML code via the browser console (Edit Okta GUI).
Note: For a full overview regarding which attributes will be supported for which user profile with Microsoft Office 365, take a look at the Okta site here (User profile attributes)
Troubleshooting of Okta GUI
To enable the option Sync Okta Password open the HTML editor of your Browser and change the HTML code as shown below.
Scenario 2 – WS Federation
Create custom domain
As an alternative and best practice from Okta perspective we will configure WS Federation for the Microsoft Office 365 integration. For that we will first of all integrate a custom domain in our Microsoft Azure tenant. So, you will need your own public domain to integrate into Azure AD and federate with Okta.
- Log into Azure AD
- Azure Active Directory
- Custom domain names
- Add custom domain
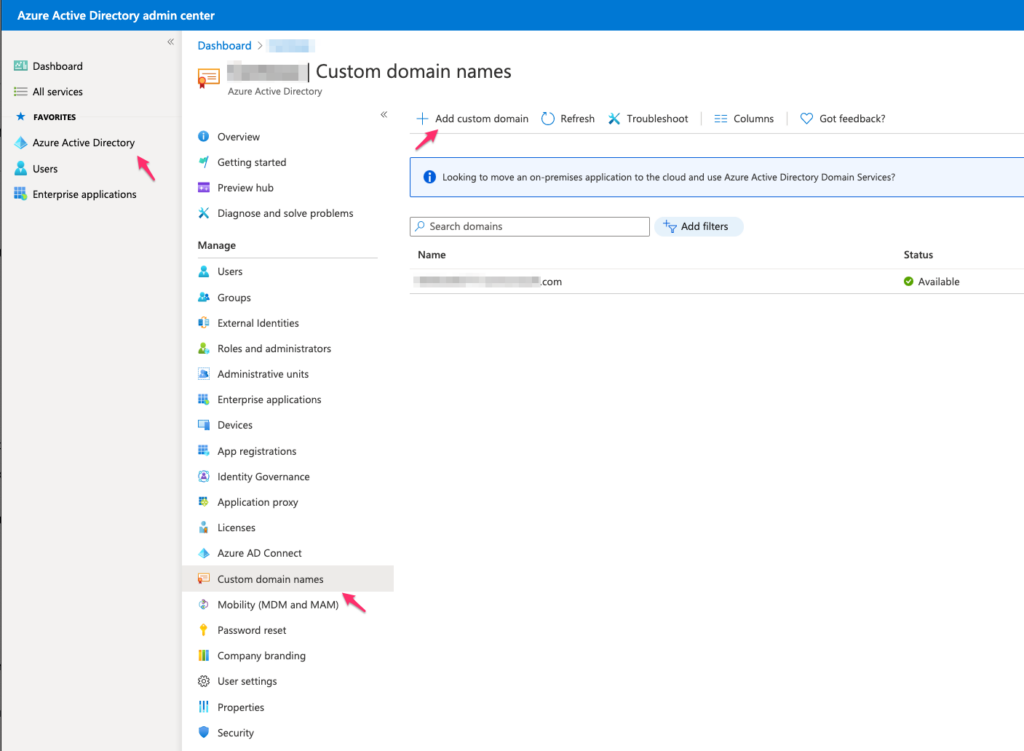
- Enter your pubic available domain (example: mydomain.com)
- You have to configure your domain with your domain registrar with the settings you will see after entering your domain (have to be a top-level domain ending like .com, .net etc.)
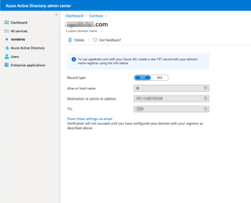
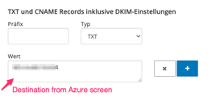
- Log into your domain hosting Service where you ordered or want to order the domain and edit the DNS txt record. Please be aware you have to use a service at where you´re able to edit the DNS entries.
Back in the Microsoft Azure console
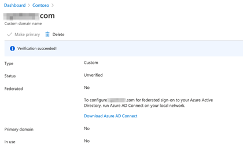
- Click Verify
- Azure will check if the DNS entries for your domain are correctly set
- You will see the screen below
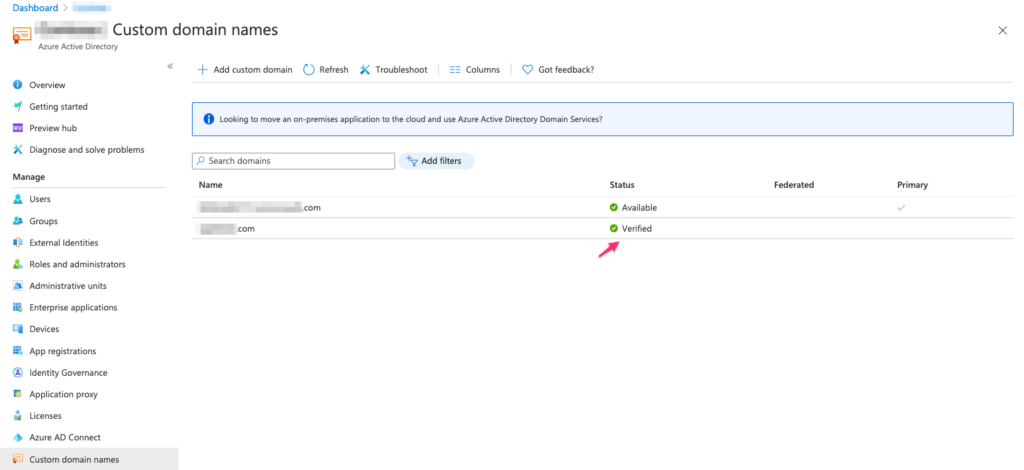
- Click Azure Active Directory
- Custom domain names
- Check if your domain is verified
Configure the WS-Federation for Microsoft Office 365 in Okta
One information upfront. If you want to use WS-Federation with Microsoft Office 365 and user provisioning via SCIM from Okta to Workspace ONE Access and Workspace ONE UEM via AirWatch provisioning, please make sure the custom domain fits the same domain as the Universal Directory from Okta you created before. Reason behind is that the domain has to be the same through all systems to have an end to end provisioning and usage of the same user accounts in all systems (Directory creation Okta).
- Log into Okta
- Applications
- Applications
- Add Application
- Microsoft Office 365
- Add
- Application Label = choose a name (Example: Microsoft Office 365)
- Microsoft Tenant Name = your Azure AD tenant primary domain
- Example: MyAzureTenant.onmicrosoft.com
- Your Office 365 company domain = your custom domain we created and added previously
- Example: mydomain.com
- Choose the Microsoft Office 365 features you want to use
- Next

- Tab Sign-On Options
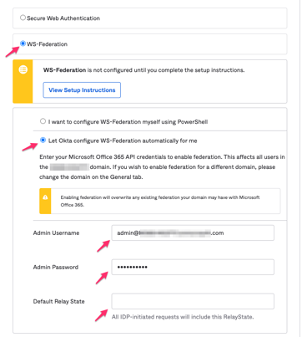
- Choose WS-Federation
- Choose Let Okta configure WS-Federation automatically for me
- Put in your Microsoft Office 365 (API) credentials
- Admin Username = admin@primaryAADdomain.com (myDomain.onmicrosoft.com)
- Admin password = x
- Default Relay State = leave blank
- Done
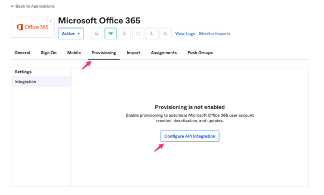
- Provisioning Tab
- Click Configure API Integration
- Check the Box Enable API integration
- Enter the Admin Username (Azure AD primary domain)
- Enter Admin Password
- Import Groups keep checked
- Click Test API Credentials
- Save
- Provisioning tab click Edit
- Enable Create Users
- Enable Update User Attributes
- Enable Deactivate User
- Keep Sync Password disabled
- In that case you will be redirected to Okta for authentication. You do not need the Azure password, nor it needs to be synchronized
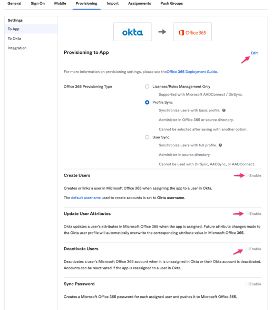
- Save
Assign Microsoft Office 365 application
To provisioning the users to Azure AD and that they can use Microsoft Office 365 applications with their Okta created user accounts you have to assign the Microsoft Office 365 application to the users.
- Log into Okta
- Applications
- Applications
- Choose Microsoft Office 365
- Assign
- Choose People or Group
- Enter Name of people of pick from the list
- Assign
- Choose the Microsoft Office 365 license
- Save and Go back
- Done

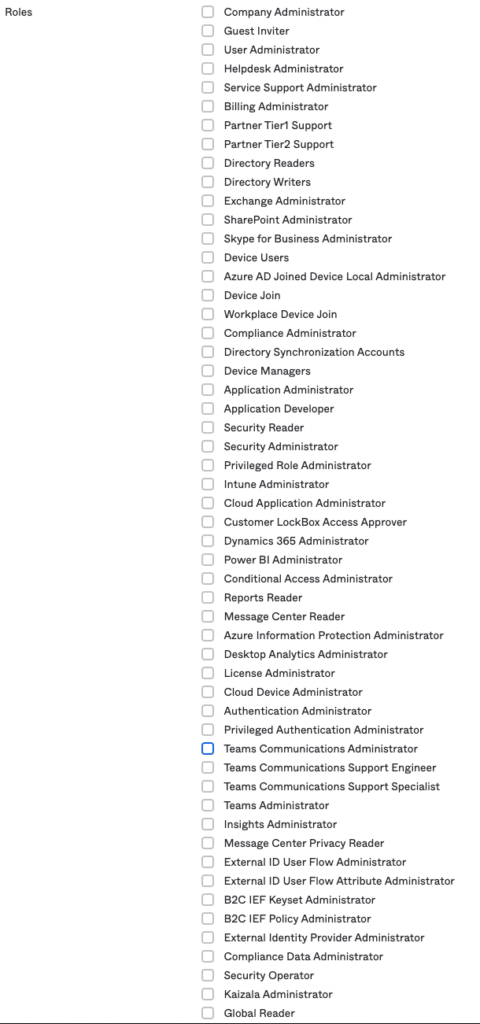
You can choose a role additionally if you want but that is not necessary.