Now I will describe how you can handle Group creation within Okta and make sure it will be associated to the correct Directory.
Create Okta Group to synchronize to Workspace ONE Access
To be more flexible I recommend using a group assignment because then all users in that group will be deployed automatically to Workspace ONE UEM if they part of this group.
Caution: In case of using the SCIM provisioning (our case) to provision users and groups you will run in an issue on the Workspace ONE Access side. If you create a group in Okta and provision / push it via group push and SCIM to Workspace ONE Access that created group will be associated with the System Domain of Workspace ONE Access instead of the createddomain (Okta.com for instance) which we created to provision users to.
Reason behind that issue is that the Okta SCIM request to create a group don´t contain the domain attribute which is associated with the correct domain (directory) which we created before and exists in Workspace ONE Access. Unfortunately, the SCIM request to create a group in Okta can´t be customized to contain that attribute.
But good news, we can work around that. We will use Postman again.
Caution: That is only possible in case the application (Workspace ONE) in Okta is able to use unlink and relink again. In my testing it don´t worked well but to have a full overview of what is possible. Maybe it helps in another scenario. Will give it a try again later 😉
- Open Postman
- Open a new tab (or maybe you have the old one still open from create Bearer token)
- HTTP methodchoose Post
- Enter the url: https://tenanturl/SAAS/jersey/manager/api/connectormanagement/directoryconfigs
- Replace tentanturl with your Access tenant url
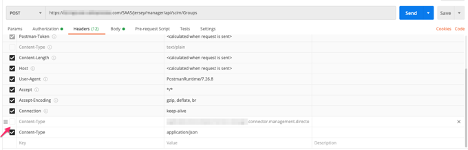
- Check that the authorization header is OAuth 2.0
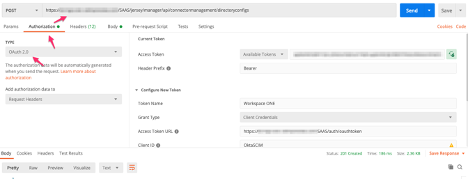
- Under Headers set Content-Type to application/json
- Make sure if you use the old tab from Bearer token creation, that you disable the Content-Type entry from that (application/vnd.vmware.horizon.manager.connector.management.directory.other+json)
- Now we create the group in Workspace ONE Access which will be later associated with the group we will create in Okta. As follows an example, please replace:
- DisplayName = the Name of the group in Okta (you will create it or have it done)
- Domain = the domain we previously created in Workspace ONE Access for Okta
Example:
{
"schemas":[
"urn:scim:schemas:core:1.0",
"urn:scim:schemas:extension:workspace:1.0"
],
"displayName": "Okta_Users",
"urn:scim:schemas:extension:workspace:1.0":{
    "domain":"mydomain.com"
}
}
Please be aware of the syntax.
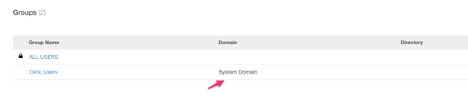
You should see like this:
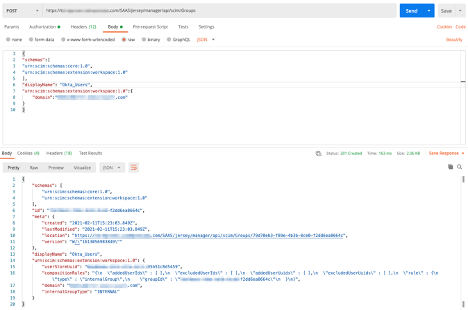
Now you can see in your Workspace ONE Access administration console the created group (Okta_Users) which is associated with the created Directory and domain for the Okta SCIM provisioning.

Now we have to (can) create the Group in Okta and make the users a member of that.
- Log into your Okta tenant
- Directory
- Groups
- Add Group
- Choose a name and description
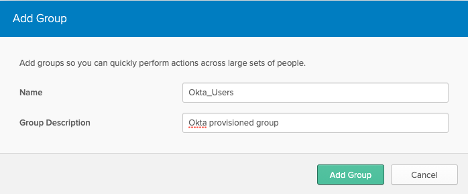
- Add Group
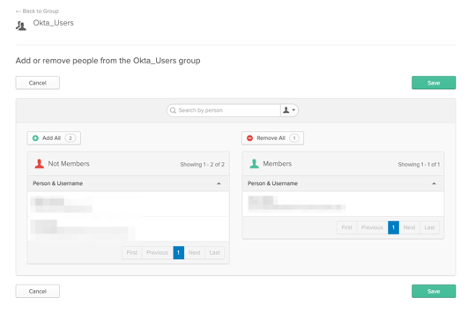
- Manage People
- Add the members
- Application tab
- Same procedure as for users, assign the Workspace ONE application to the group for provisioning
- BUT, one additional step here
- Applications tab at the top
- Applications
- Assign the applications you want (Workspace ONE for instance)
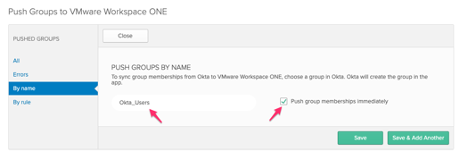
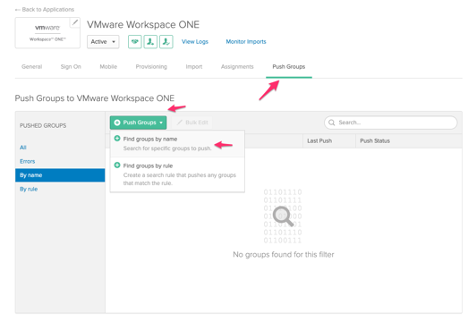
- Tab Push Groups
- In the green box Push Groups click the arrow
- Find groups by name (you can choose what you want)
- Type in your created Group in the search box
- Check the box Push group memberships immediately
- Save